Hackathon Guide
Everything you need to get started with NVIDIA Jetson at a hackathon. Setup tips, project ideas, and resources to help your team build an impressive AI project.
 Chitoku YATO
 Hackathon Guide
The NVIDIA Jetson empowers you to bring your innovative ideas to life.
It’s a powerful, compact edge AI computer with plenty of examples and learning resources to help your team build an impressive AI project at a hackathon. See examples of successful hackathon projects.
Explore the tips, guides, and resources below to get started and make the most of your Jetson experience.
Good luck, have fun, and happy hacking!
Initial Setup
Ideally, your Jetson developer kit comes pre-setup. But you can also set it up yourself.
Check the default username and password with the person or organization who provided the hardware.
- Username:
jetson - Password:
jetson
The system is typically set up on a microSD card (for Orin Nano), and the device may also have an NVMe SSD attached for additional storage.
💡 Tip
If an SSD is available, see SSD + Docker Setup to move your Docker data directory to the SSD for faster container performance.
If the Jetson has not been set up, go through the initial setup guide that matches your hardware:
- Getting Started with Jetson — user guides, SSH setup, and agentic skills
- Jetson Orin Nano 8GB Developer Kit — User Guide
- Jetson AGX Orin 64GB Developer Kit — User Guide
- Jetson AGX Thor Developer Kit — User Guide
Physical Setup
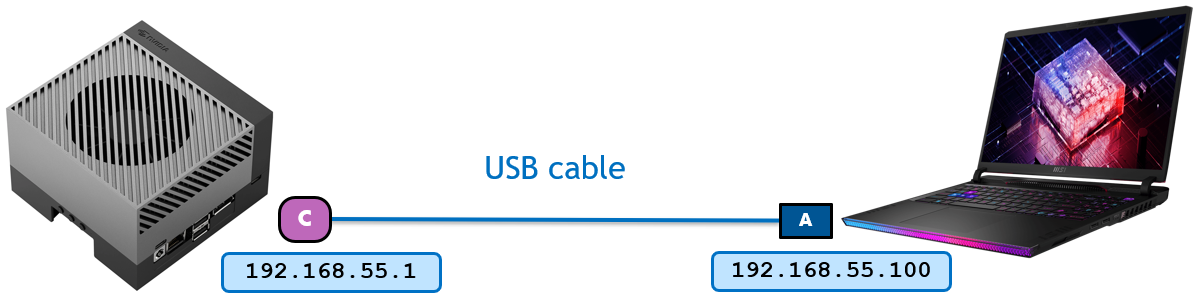
A headless setup with Jetson’s USB Device Mode provides an easy way to connect your laptop directly to a Jetson with minimal cabling.
Follow these steps:
Take the Jetson developer kit out of the box and connect the bundled power supply.
Find a USB cable to connect the Jetson to your PC (USB-C end goes into the Jetson).
You should see a “L4T-README” drive automatically mounted on your PC.
Open a terminal on your PC and SSH into the Jetson:
🔰 What is SSH?
SSH (Secure Shell) lets you remotely control the Jetson from your own laptop’s terminal — as if you were typing directly on the Jetson. No monitor or keyboard needs to be plugged into the Jetson itself.
On Windows, open PowerShell or Command Prompt. On Mac/Linux, open Terminal. Then type:
ssh USERNAME@192.168.55.1📘 Note
Replace
USERNAMEwith the username set on the Jetson. Check with the person or organization who provided the hardware for the username and password. You will be prompted for the password after running the command.The address
192.168.55.1is a fixed IP that the Jetson assigns itself over the USB cable — you do not need to look it up.
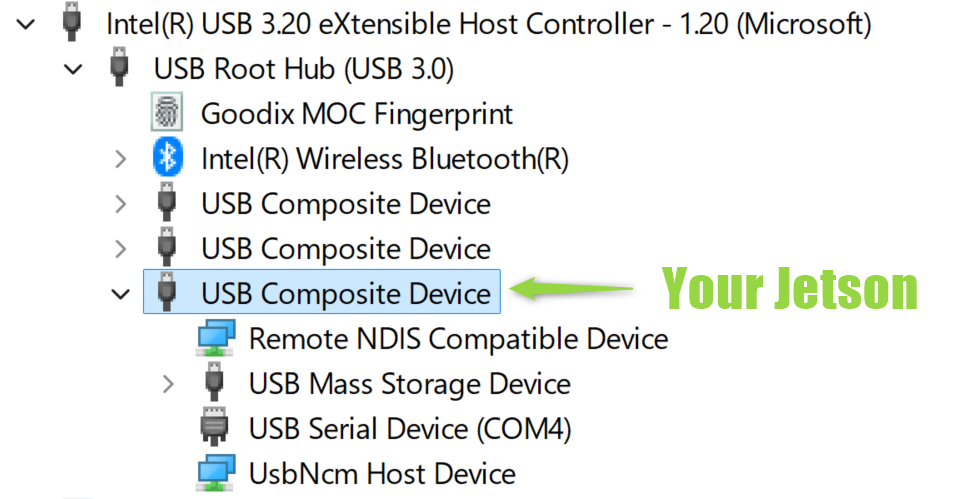
How USB Device Mode works
When Jetson is connected to a PC, it acts as a USB Composite Device that presents several USB device classes:
- USB Ethernet - provides a virtual NIC for SSH access
- USB Mass Storage - lets the PC mount the “L4T-README” drive
- USB Serial - provides serial console access
When connected to a Windows PC, “Device Manager” in “Devices by connection” view shows something like the following:
You can also get Jetson on a Wi-Fi network to have Internet access and allow your team members to simultaneously access Jetson.
If you have a PC monitor, DisplayPort cable, USB keyboard, and mouse, you can use Jetson as a standalone computer and do all the work on it.
Network Connection
After you’ve connected to the Jetson via USB (above), you’ll want to connect it to a network so it has internet access (for downloading models, packages, etc.) and so multiple team members can SSH into it at the same time.
🔰 Why do I need this?
The USB connection only lets one PC talk to the Jetson and does not provide internet. Connecting to Wi-Fi or Ethernet gives the Jetson its own IP address on the local network, enabling internet access and multi-user SSH.
While SSH’d into the Jetson via USB, run this command to connect to Wi-Fi:
sudo nmcli device wifi connect WIFI_SSID password WIFI_PASSWORDReplace WIFI_SSID with your Wi-Fi network name and WIFI_PASSWORD with the password.
If an Ethernet cable is available, simply plug it into the Ethernet port on the Jetson. Most networks will automatically assign an IP address via DHCP — no extra commands needed.
Finding the Jetson’s IP Address
Once connected to Wi-Fi or Ethernet, find the Jetson’s new IP address by running this on the Jetson (via your existing USB SSH session):
hostname -IThis prints the IP address(es) assigned to the Jetson. Look for an address like 192.168.x.x or 10.x.x.x (ignore 192.168.55.1 — that’s the USB connection).
SSH over the Network
Once the Jetson is on your Wi-Fi or Ethernet network, you no longer need the USB cable. Any team member on the same network can SSH into the Jetson directly from their own laptop:
ssh USERNAME@JETSON_IPReplace USERNAME with your Jetson’s username and JETSON_IP with the address you found above (e.g. ssh jetson@192.168.1.42).
🔰 No USB cable required
The USB cable was only needed for the initial setup — to connect the Jetson to Wi-Fi or Ethernet. Once the Jetson has a network IP address, you can unplug the USB cable and SSH over the network from any laptop. Multiple team members can connect at the same time, each from their own machine.
💡 Tip
Sometimes, the Wi-Fi network policy blocks device-to-device connections (like SSH).
USB Device Mode still lets you connect via the USB cable, but limits access to one PC. If your team needs multiple PCs to access Jetson simultaneously but Wi-Fi blocks SSH, bring a portable Wi-Fi router to create a local network, or use an Ethernet cable to a shared switch/router.
Use VS Code or Cursor for Remote Development
Instead of working in a plain terminal, you can connect VS Code or Cursor directly to the Jetson over SSH. This gives you a full IDE experience — file browsing, code editing with syntax highlighting, integrated terminal, and extensions — all running on your laptop while the code executes on the Jetson.
Install the Remote - SSH extension:
- VS Code: Open Extensions (
Ctrl+Shift+X), search for “Remote - SSH” by Microsoft, and install it. - Cursor: The Remote - SSH extension is built-in — no installation needed.
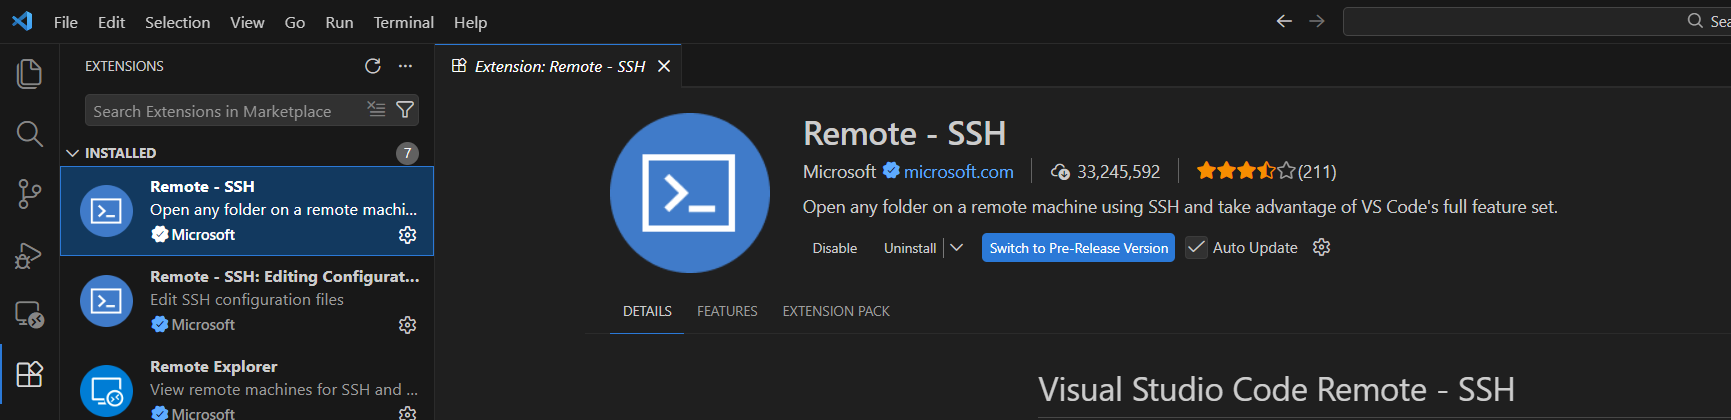
- VS Code: Open Extensions (
Open the Command Palette (
Ctrl+Shift+P/Cmd+Shift+Pon Mac) and select “Remote-SSH: Connect to Host…”Enter the SSH connection string — for example:
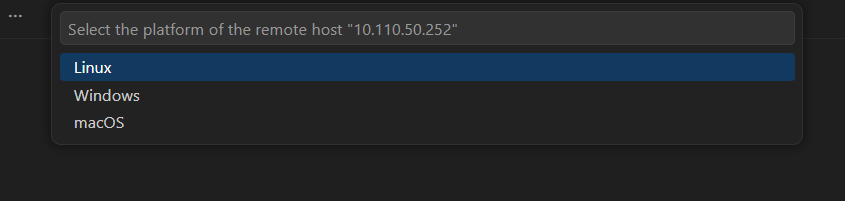
jetson@192.168.1.42USERNAME@JETSON_IPWhen prompted, select Linux as the platform for the remote host:
Enter the password when prompted:

The editor will connect and install a lightweight server on the Jetson automatically.
Once connected, you’ll see “SSH: <IP address>” in the bottom-left corner. Use Open Folder to browse and edit files on the Jetson, and open the integrated terminal (
Ctrl+`) to run commands — all from the comfort of your laptop’s IDE.
💡 Tip — Save your SSH config for one-click access
To avoid typing the IP address every time, add the Jetson to your SSH config file (~/.ssh/config):
Host jetson
    HostName 192.168.1.42
    User jetson
Replace the IP and username with your values. After this, you can simply select “jetson” from the host list in VS Code/Cursor — or type ssh jetson in a terminal.
Example Projects
There are many great AI project examples on this site. Here are a few to get you inspired:
Live VLM WebUI: Real-time Vision AI
Live VLM WebUI lets you evaluate Vision Language Models in real-time with a webcam. Point your camera at objects, scenes, or text and get instant AI-powered descriptions and answers.

This is a great starting point for building projects that need visual understanding - from accessibility tools to interactive demos.
Go to Live VLM WebUI tutorial →Ollama : Run LLMs Locally
Ollama is a popular open-source tool for running large language models locally. It has official Jetson support, letting you run models like Llama, Gemma, DeepSeek, and more entirely on-device with GPU acceleration.
Go to Ollama tutorial →More Ideas
Browse the full Tutorials page for more examples across LLMs, VLMs, VLAs, image generation, speech, and robotics. Check out the Community Projects page to see what others have built.
Troubleshooting
Cannot SSH into Jetson after connecting USB-C cable
- Check if the green LED near the USB-C port is lit (power indicator). If not, verify the DC power supply connection to the wall outlet and the Jetson carrier board.
- Check if the “L4T-README” drive appears on your PC. If not, try a different USB-C cable or check connections on both ends.
Cannot log in with provided credentials
- Double-check the username and password you typed.
- Someone may have changed the password of the default user. If you cannot find the updated password, you may need to reflash — see the Getting Started with Jetson guide and the official user guide for your kit.
Jetson seems slow
Check your power mode:
nvpmodel -qInstall jtop (jetson-stats) to monitor resource utilization:
sudo apt install -y python3-pip
sudo pip3 install -U jetson-stats
The CTRL tab in jtop lets you change the power mode under NVP modes.
How to check Jetson resource utilization in real-time?
Install jtop:
sudo apt install -y python3-pip
sudo pip3 install -U jetson-stats
How to power Jetson with a battery?
Use a USB power bank that supports 12V output via Power Delivery (PD) with a USB PD to DC power jack adapter cable.
Resources
- NVIDIA Developer Forum - Jetson - Ask questions and find answers
- Jetson AI Lab Discord - Join the community